Tillerless Helm with Azure DevOps Pipelines
Helm has become the standard for delivering and deploying applications into Kubernetes, and generally, it does make life easier. However, one thing you’ll hear a lot is that there are security concerns with using Helm in production. A lot of these concerns focus on the Tiller component of Helm.
Tiller is Helms server-side component which runs inside the cluster and is used to deploy applications. The default installer of Tiller on an RBAC enabled cluster includes the creation of a service account for Tiller to run as which has cluster-admin permissions. These increased permissions are a significant security concern, as this Tiller pod could now be used to do anything on the cluster. This issue is further compounded by the fact that by default, communication with Tiller is open to anyone.
It is possible to lock down Tiller using TLS to secure who can access it, but ultimately if you need Helm to deploy to multiple namespaces, it is still going to need a high level of access. Another technique for security Tiller is to restrict the service account to deploying to a particular namespace and deploy multiple Tillers with different service accounts, scoped to each different namespace. All of this can make things more secure, but it comes with complexity and overhead. The technique we are going to talk about today is to remove Tiller from the cluster altogether and run deployments using the rights of your account, or deployment service account. In particular, we are going to look at how to do this on your Azure DevOps deployment pipelines.
Helm 3
Before we get into this solution, a quick note on Helm 3. The upcoming release of Helm 3 will remove Tiller altogether, with all deployments done by the end-users/service accounts permissions. At the point of writing this article, Helm 3 is still in beta. Once this reaches GA, this will be the recommended way to deploy Helm charts securely.
Tiller-less Helm
The concept of Tiller-less helm is not to run Tiller on the Kubernetes cluster at all. Tiller is still required for deployment; however, in this solution, we will run Tiller locally on the build server at the point of the deployment. Because Tiller stores all it’s deployment data on the cluster as Config-Maps or Secrets then there is no need to hold any state locally.
Running Tiller locally has several security benefits:
- Tiller is only running for the duration of the deployment
- Tiller is only running on the machine doing the deployment and only accessible to that machine
- Tiller is communicating with the Kubernetes cluster using the credentials of the local user (either a standard user or service account) and so can be scoped to only have the rights required to undertake the deployment
- As Tiller is created on-demand, it can be configured to store deployment details in specific namespaces for each deployment, rather than just in Kube-System
Pre-requisites
Before we start trying out Tiller-less Helm, you are going to want to make sure that the Kubernetes cluster you are running against isn’t running Helm. To check, take a look at your deployments by running:
kubectl get deployments -n kube-system
If Tiller is installed, you will see a deployment called “tiller-deploy”. If this is the case, you can remove it by running:
kubectl delete deployment tiller-deploy -n kube-system
Tiller-less Helm Plugin
Instantiating a Tiller instance locally is relatively straightforward, but to make our lives even more comfortable, we are going to use the Tiller-less Helm plugin by rimusz. This is a plugin for Helm that allows us to start and stop a local helm instance with a single command. It also features a start command tailored for CI that we will use in our deployment.
Note that this plugin is currently only supported on Linux, so if you want to run it yourself you will need either a Linux machine or use Windows Subsystem for Linux (it runs fine on WSL).
You can try out this plugin locally if you have Helm installed by running this command:
helm plugin install https://github.com/rimusz/helm-tiller
Once it is installed you can run this command to start a local tiller instance:
helm tiller start
This command starts a local Tiller instance, using your currently configured Kubectl configuration, and then open a shell with the right environment variables set for you to use that till. You can then issue Helm commands as you would normally.
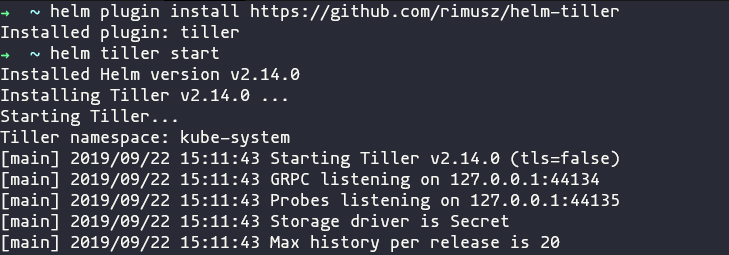
Once you are done, you can run this command to stop the Tiller instance:
helm tiller stop
This process works great for local interactive sessions, but as we want to deploy from Azure DevOps, we are going to be using the “helm tiller start-ci” command. This does the same as the start command, except that it does not start a new interactive terminal.
Using Tiller-less Helm in Azure DevOps
So now we know how this all works, let’s look at how we can use that for our deployments in Azure DevOps. We are going to need to create a few steps in our Azure DevOps release, but nothing to complicated. The entire process to release a Helm chart will look like this:
- Install Kubectl and Helm
- Install the Tiller-less Helm Plugin
- Login to the Kubernetes cluster to ensure we have credentials to run as
- Start the Tiller-less Helm process
- Run our standard Helm commands
- Stop the Tiller-less Helm process
As mentioned before, you will need to use a Linux build machine, as the plugin is only supported on Linux. If you had to use Windows, then you could probably do something with manually starting Helm. In the steps below, I am assuming you are using a Microsoft provided hosted build agent, so we need to take care of things like installing Kubeclt and Helm. If you’re using a private build agent with these things already installed, then you can skip those steps.
Install Kubectl and Helm
The first step is to ensure that Kubectl and Helm are installed on the build agent. We can do both of these at the same time with the “Helm Installer Task”.

This task doesn’t require any further configuration unless you want to set a specific Helm version.
Install the Tiller-less Helm Plugin
To install the plugin we need to run the “Helm Plugin Install” command we saw earlier, so we are going to do this with a Bash task.

To keep things simple, we are going to create an inline script that runs this command. I’ve added some additional code that first checks if the plugin is already installed. On a hosted build agent, likely, it is not, so you may not need this. If you use a private build agent, you would need to make this check; else if it is already installed, it will fail. The command I run looks like this:
installedHelm=$(helm plugin list | grep -c tiller)
if [ ${installedHelm}  -eq 0 ]
then
    helm plugin install https://github.com/rimusz/helm-tiller
fi
Complete Task:

Login to Kubernetes
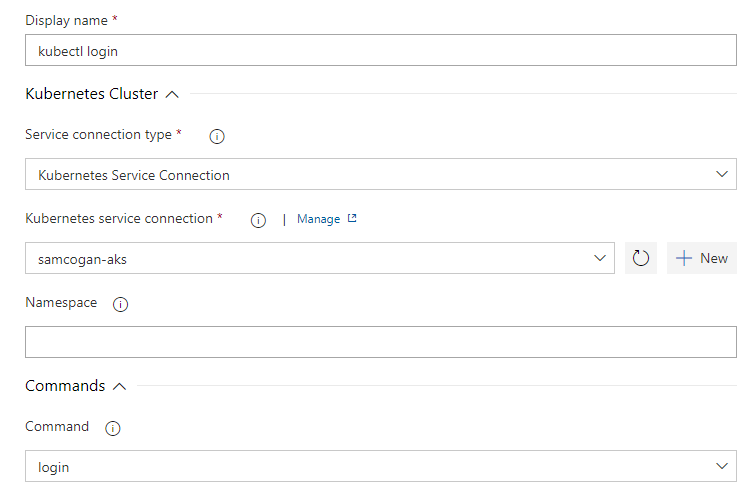
For Tiller running on the build agent to be able to talk to Kubernetes, it needs to have some credentials to use. To do this, we are going to use the “Deploy to Kubernetes” task:

To use this task, you need to have a service connection already created in Azure DevOps containing credentials to access Kubernetes. These credentials can be using an Azure Subscription if you’re using AKS, a Service account or Kubeconfig. I would recommend using a service account, which we have discussed previously here.
This service account will be the account that Tiller runs as, so it needs to have enough rights to do whatever your Helm deployment needs. If you see errors in your deployment relating to permissions, it will be down to the permissions of this account.
In this task, we need to complete the following:
- Service Connection Type
- Service Connection
- Command
We will set the command to “login”, The rest of the fields like “namespace” can be left blank.
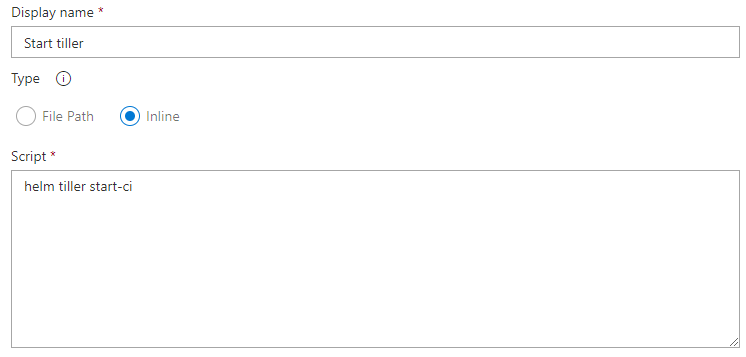
Start the Tiller-less Helm plugin
Now everything is set up, we can start our local instance of Tiller. This task is another Bash script, this time just running this command:
helm tiller start-ci
Run Helm Commands
Now that Tiller is running we can use the “Package and Deploy Helm Charts” task to install Helm charts or run any other Helm command we need.

The only difference in this command from when you run Helm on the cluster is that we need to set an environment variable to tell Helm where to find Tiller. To do this expand the environment variables section and add a variable called “HELM_HOST” with a value of “127.0.0.1:44134” (assuming you did not set a different port for the plugin).

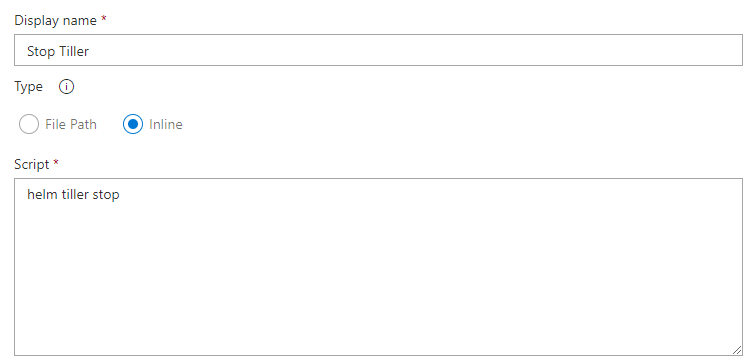
Stop Tiller
Now that we have run all our required Helm commands, we no longer need Tiller so we can stop this with another Bash task running this command:
helm tiller stop
Conclusion
Now that everything is set up, you can run the deployment and watch the process. You will see Tiller is only running for the duration of the deployment, it is running on the build agent, and running in the context of the requested service account or similar.
This process is a much more secure way of utilising Helm, which does not require you to have Tiller running 24/7. The Tiller-less Helm plugin also stores it’s deployment data as secrets rather than config-maps, which enhances the security further.
Helm 3 will do away with the concept of Tiller entirely, and so should be more secure by default, but until that is ready for production, this approach is a good way to continue to use Helm without some of the security headaches.
Image Attribution
_IGP6648 flickr photo by lovestruck. shared under a Creative Commons (BY-NC) license
