Testing Packer Images with Pester
In an article earlier this year, we looked at using Azure DevOps to build Azure VM images using Packer. We created a pipeline that used Packer and PowerShell DSC to provision a VM in Azure, install the required software and configuration and then take an image of the VM that we could then use as a base for creating new VM’s or VM Scale Sets.
This process works great, and I am still using it today. In this article, we are going to expand on this and look at testing these images. In the pipeline we created in the previous article, we are assuming that if the build ran through without errors, then our image is complete, and everything we needed installing is installed. This is a somewhat naïve approach, as it is entirely possible that either things fail to install but don’t generate an error for DSC to catch, or we forget to configure things or misconfigure them. To combat this, I want to add tests into our build process, so that we can check that the VM is configured how we think it should be.
All of the code required to run this process can be found on GitHub.
Pre-requisites
I’m not going to cover creating an image build with Packer here, as I covered that extensively in this article. To be able to follow the rest of this article, you will need a working build pipeline that creates an Image using Packer.
This example is going to continue with the approach of using Azure DevOps, but you can use any other build tool, you’ll need to tailor the process to that.
Pester
We are going to use Pester to run the tests against this VM. If you’re not familiar with Pester, it is a testing framework for PowerShell. If you have basic knowledge of PowerShell, you will be able to write Pester test. I’m not going to cover using Pester in this article, but if you want to get started with it I recommend reading this introduction to Pester.
Pre or Post Image Tests
There are two points we can run our test. Initially, I had considered waiting until after Packer did it’s work and created an image, and then create a VM from that image to run tests against. While this will work, it is going to be a relatively slow process, given that we need to wait for a VM to be created. We will also have to do all the work to get Azure DevOps to be able to talk to the VM and run the tests.
A better approach is to run the tests as part of the Packer process as an additional step after the VM is configured, but before we Sysprep and take an image. That way if the tests fail, we abort before creating an image, and we can also utilise Packers already existing connection to run the tests. Using Packer to do this is a relatively simple process, as the Pester tests we want to run are just PowerShell scripts as far as Packer is concerned and can be executed with the PowerShell provisioner.
Creating Tests
The first thing we need to do is write the tests that we are going to run, so we need to determine what it is on the VM that you want to validate. In this example, we are going to keep it simple, and we want to check that some Windows Features are enabled. You can make your tests as complex as you like, so long as you can find a way to check the thing you are interested in.
In this simple example, we have a single context and describe section, and then 3 tests to check for 3 different Windows features. We save this file as image.test.ps1 in a test folder within our project. The content of the file is below:
Describe "Feature Validation"{
    Context "Windows Features"{

        It "should have Web-Server Role Installed"{
            get-windowsfeature -name "Web-Server" | should be $true
        }

        It "should have Web-Mgmt-Service Role Installed"{
            get-windowsfeature -name "Web-Mgmt-Service" | should be $true
        }

        It "should have Web-Asp-Net45 Role Installed"{
            get-windowsfeature -name "Web-Asp-Net45" | should be $true
        }

    }
}
Running Tests
Now we have our tests written, and we need to run them as part of our Packer process. To do this, we need to add 4 new steps to our packer.json file.
Upload Files
The first thing we need to do is upload our test files (image.test.ps1) onto the VM so it can be run. You’ll need to upload this to an already existing location; I am using c:\packages as this always exists on an Azure VM and is writeable.
    {
      "type": "file",
      "source": "./tests/Image.test.ps1",
      "destination": "C:/packages/"
    },
If you have multiple test files, you want to run you can upload the folder as a whole.
Run Tests
Now the file is uploaded, we are going to use Pester to execute the tests, using the “invoke-pester” command. You could create a separate script file to run this, to keep things simple I am doing it as an inline task.
    {
      "type": "powershell",
      "inline":[
          "Invoke-Pester C:/packages/Image.test.ps1 -OutputFile TestResults.xml -OutputFormat NUnitXml"
      ]
    },
Let’s look in a bit more detail at this command so that you can see what it is doing. The first parameter is the test file we want to run. The next two parameters “-OutputFile TestResults.xml -OutputFormat NUnitXml” let us output the results of the tests to a file, in the NUnit format. We will use this file later to be able to display the results of our tests in the Azure DevOps UI.
Download Results
We’ve output the results of the test to a file, but this file is still on the VM, so we need to download this onto the Azure DevOps build agent so we can publish this data as part of the build results. We add a file step, with the direction of “download” to do this.
    {
      "type": "file",
      "source": "TestResults.xml",
      "destination": "TestResults.xml",
      "direction": "download"
    },
Check Results
If any of our tests have failed, we want to cancel the build; there is no point going through with the image creation if the resulting images are failing our tests as it will just waste time and resources. So if we fail the test, we want things to get cancelled. The easiest way to do this would be to have the test runner step return a non 0 exit code, but this causes us a problem. If we do that, we don’t reach the step to download the results, and so we can’t then publish them in Azure DevOps. Instead, we are going add a step that happens after the download, that looks at the testresult.xml file, and it then returns an exit code based on the number of failed tests. If there are no failures, then the exit code is 0, and everything carries on, any failures and things stop.
To do this, the first thing we do is create a PowerShell script called getTestResults.ps1 that checks the XML and outputs the return code, and store this in the root of our packer project:
[xml]$testResults = Get-Content -Path .\TestResults.xml
$totalIssues=[int]$($testResults.'test-results'.errors) + [int]$($testResults.'test-results'.failures) + [int]$($testResults.'test-results'.invalid)
exit $totalIssues
Then we add a step to our Packer process to check this:
{
    "type": "powershell",
    "script": "./getTestResults.ps1"
},
Publish Results
We now have everything configure to run these tests when we build an image. The last step we want to do is have Azure DevOps read in the results file so that it can show us the test results in the UI. To do this, we use the “Publish Test Results” step to read in the file. The step in a YAML build definition to do this is below:
- task: PublishTestResults@2
  inputs:
    testResultsFormat: 'NUnit'
    testResultsFiles: '**/TestResults.xml'
  condition: succeededOrFailed()
Note we add the condition of “succeededOrFailed” as we want this step to run regardless of whether the Packer builds succeeded or failed.
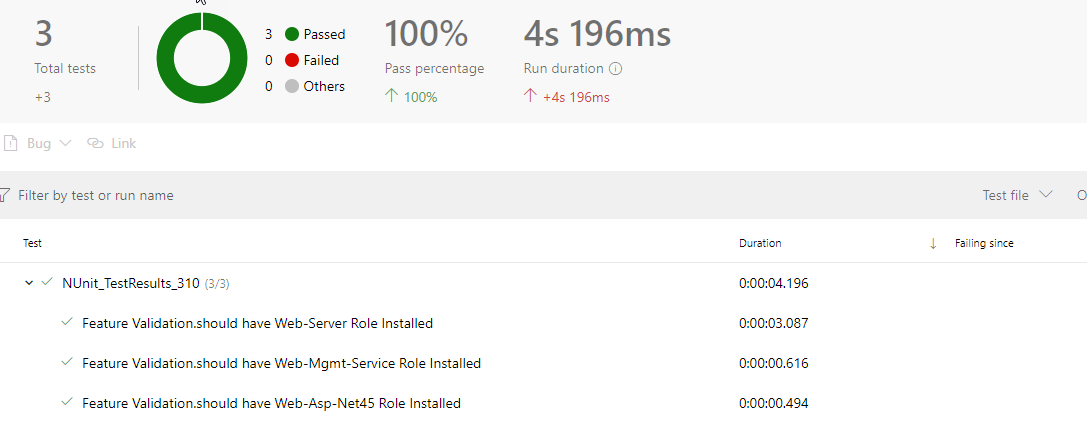
This will then show us our test results in the UI under the tests tab. If all passes we should get a beautiful green circle and our image gets created.
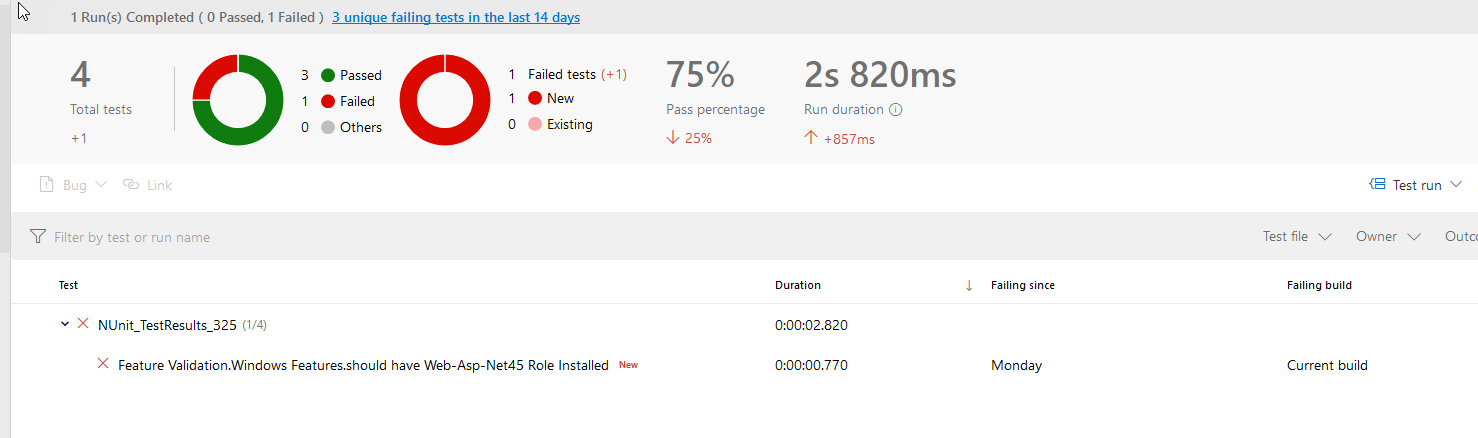
If there are failures, they are listed in the build, and our image is not produced.
If you want to look at the code for all of this or replicate it yourself, please check out my repository on Github.
