Stream SmartThings data to Cosmos DB and PowerBI Part 4 - A Cheaper Alternative
A little while ago I wrote a series of posts talking about how to send your SmartThings home automation data to Azure to capture and report on, using tools like Event Hub, Cosmos DB and Power BI. This solution works great, and I am still running this today, but there was one downside. To transfer the data we collected from Event Hub to Cosmos we were using Azure Stream Analytics. This process worked fine, but it was overkill for what we were doing. We weren’t doing any processing or transformation of the data, it was purely moving it from Event Hub to Cosmos, and this was a waste. Additionally, the smallest Stream Analytics SKU came in at around £90 a month, which made it prohibitively costly for anyone doing this as a hobby project.
I’ve finally had some time to go back and look at how we can do this more cheaply, and I’m happy to say I have a solution. The central premise of this change is that we do not need this data to be streamed to Cosmos and PowerBi in real time, we’re interested in historical data, not live stats. Given that, what I have done is moved to a solution where data is sent to Cosmos DB on a regular schedule, rather than as soon as it comes in. By doing this, and changing to use Azure Functions as our processing engine rather than Stream Analytics the cost is reduced dramatically. The processing part can even be free in you stay within the Azure functions free grant.
For the rest of this article, I am assuming you have already deployed the solution in parts 1-3 and are wanting to swap out the steam analytics portion. If you’re starting from scratch, I recommend you complete parts 1-3, but skip the Stream Analytics part and then come back here. I will look at creating a consolidated version soon.
The Solution
So here’s how it is going to work. We are still sending our SmartThings data to Event Hub, nothing changes there, and there are no changes on the SmartThings side. Once the data is in Event Hub we then enable a feature called Event Hub Capture; this tells Event Hub to save the data it receives out to an Azure storage account at a regular interval. Then, we are adding an Azure Function that runs on a timed schedule and collects the data from the storage account, sends it to the Cosmos database and cleans up the storage account. Once the data is in Cosmos, we can then read it in Power BI and display our reports. If you have already implemented the original system, there is a slight change to the PowerBI reports to deal with this, which we will deploy later.
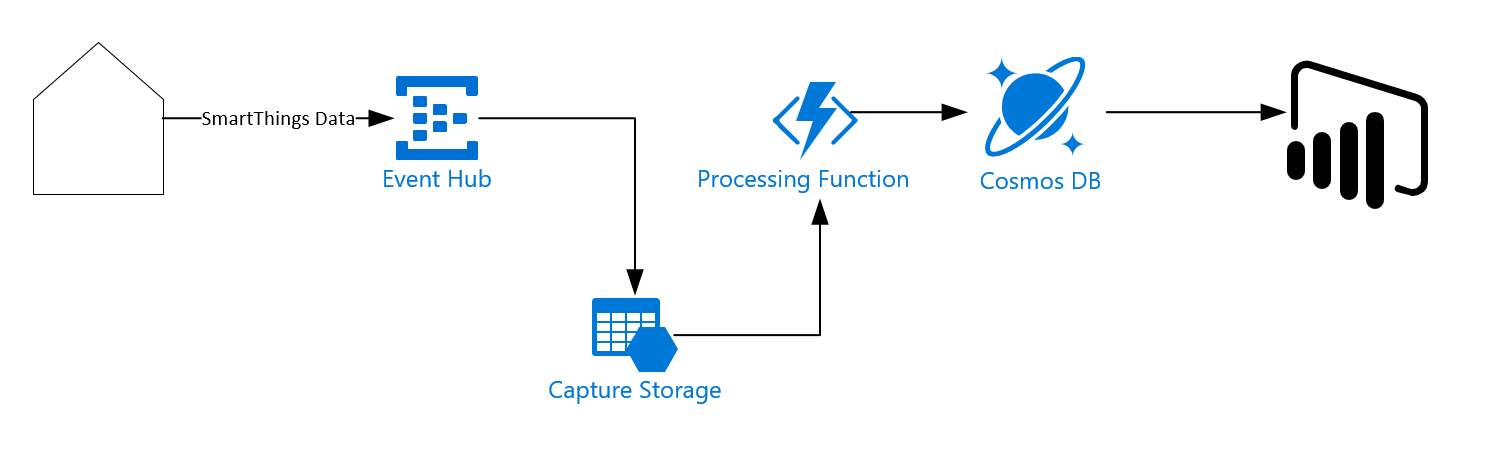
Because the function is only running a few times an hour, and because we never run more than 1 instance of the function at once, the cost of this is now minimal. For most people, it falls into the free grant of function minutes.
Deploy the Solution
Azure Resources
We will be deploying a few new Azure resources for this solution:
- A storage account to hold your event captured data and function code
- An Azure KeyVault to hold your storage secret
- An Azure Function to do the work
I’ve created an ARM template to deploy all this work for you, which you can run by clicking on this button:

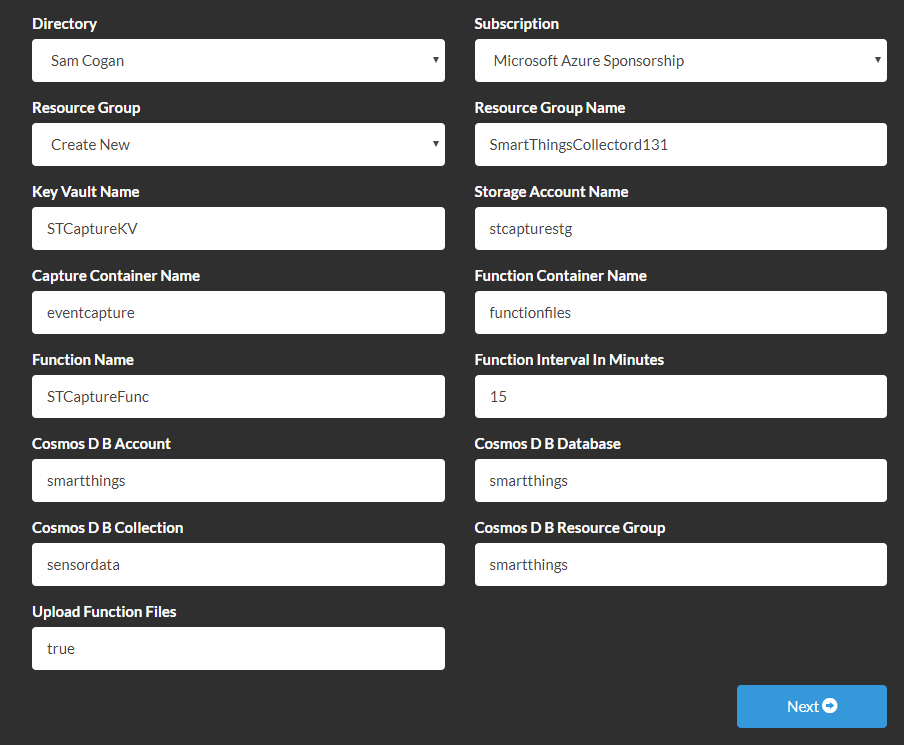
When you click on this you will be presented with a few parameters you need to fill in or accept the defaults:
- KeyVault, Storage and Function Names - if you accept the defaults this will work fine, but if you prefer to override them, please do. A random suffix will be added to keep them unique
- Capture and Function container names - Name of the storage containers where your capture data and function app data will be stored. Again you can leave as default if you are happy
- Function Interval in Minutes - This is how often the function will collect your data, the default is 15 minutes. I would not make this value too high, as the function needs to process all the files in 5 minutes (the default limit on function runtime)
- Cosmos DB Account, Database and Collection - the name of the Account, DB and Collection in Cosmos DB where the data should be stored. These all must already exist
- Cosmos DB Resource Group - The name of the Resource group where your Cosmos DB lives
- UploadFunctionFiles - The deployment includes running an Azure Container Instance which copies the required function files into your storage account for you. This container runs for at most 30 seconds and then stops, incurring no further charges. If you would prefer not to run this, you can set this value to false. You will then be responsible for deploying the files into storage.
You should end up with a form that looks like this:
Click next, and it will show you what is going to be deployed. Click next to deploy the resources. The deployment takes around 5-10 minutes.
Storage Security
In this configuration, we are making use of the new Azure Function v2 feature called Deploy from Package, which allows you to deploy a function using code from a zip file in a storage account.
To make things deploy in a fully automated fashion, the storage container which stores your function code is configured to allow public read access to blobs. Given that the only data in here is the Function Code zip file, which is publically available on GitHub, then I don’t see any real issue for this. However, if you would prefer to secure this container, please feel free to do so manually. You will then need to generate a SAS token for reading this blob and append that to the URL stored in the function app setting called “WEBSITE_RUN_FROM_PACKAGE”
Function App
Once your resources are deployed, we need to go and check the Function app. There have been occasions where everything has deployed fine, but the Function app has failed to recognise the function until it is restarted. Go to the Azure portal and locate the resource group you used for the deployment, then the Azure Function that has been created. Click on this, when the function page loads you should see a function called “ImportData” on the left.
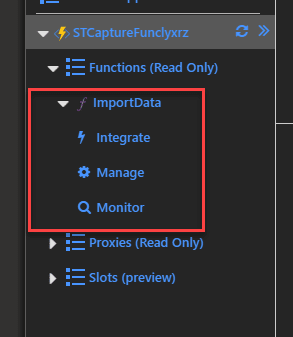
If you do not see this function, click on the restart button in the function overview and wait a few minutes for it to restart. Once it has restarted, click the refresh button in the function list and you should see the function appear. We are now ready to process data.
Event Hub Capture
We now need to turn on Event Hub Capture to get Event Hub to store the data in our storage account.
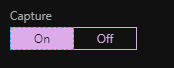
To do this, locate your Event Hub namespace in the portal. Go to Event Hubs in the left menu and click on your Event Hub. On the left-hand menu you should see an option called “Capture”, click on this and then click the button to turn on Event Hub Capture.

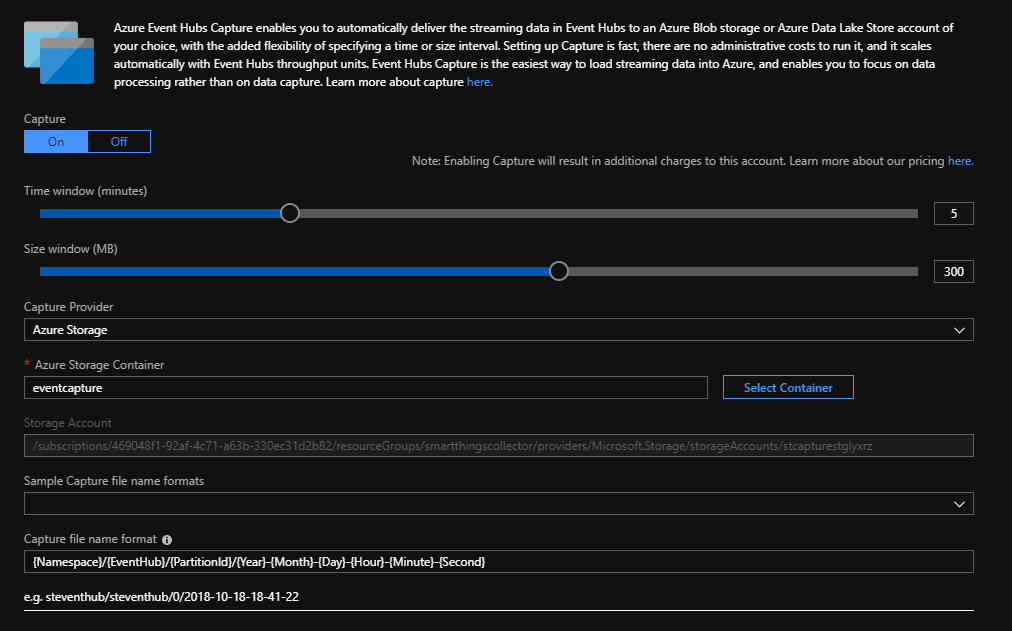
We need to configure a few things, firstly the capture window; this is how often a capture will be taken. We specify a window in both minutes and size of data, whichever is hit first will trigger a capture. The defaults of 5 minutes and 300MB are fine. Next, we need to choose Azure Storage as our “Capture Provider” and then pick a storage account and container to store them in. Select the storage account we just created and the eventhubscapture container. Finally, we need to specify a capture file name format, to keep things simple and limit the depth of folders created I suggest you use something like {Namespace}/{EventHub}/{PartitionId}/{Year}-{Month}-{Day}-{Hour}-{Minute}-{Second}
Your configuration should look something like this:
Click “Save”. The capture is now configured, and within 5 minutes you should see data being written to the storage account.
Quick Test
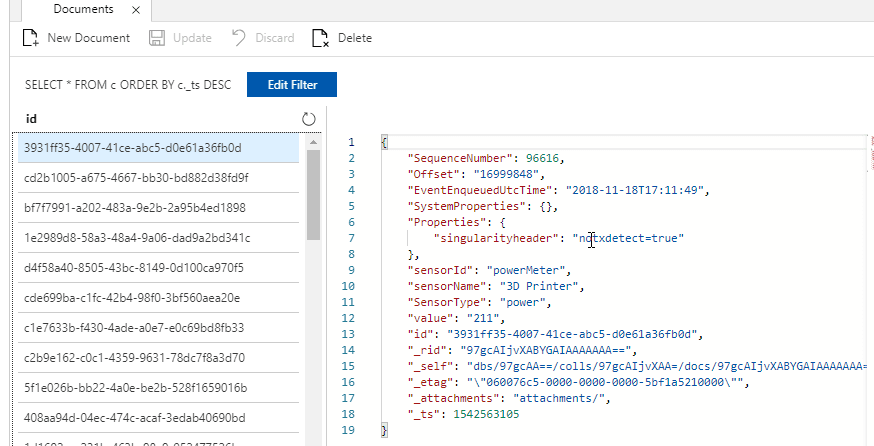
If you have set everything up correctly, you should be able to test that it is working by looking at the data in your Cosmos DB collection. If you used the default timings, then around 15 minutes after you set it up you should see the first run of the function and new records stored in the DB.
Updating the Reports
We are now successfully capturing the data to Cosmos DB; however it won’t show on our PowerBI reports yet, as we need to make a change. In the original reports we created, we were using the “Document.EventProcessedUTCTime” as the value for the time of an event, this is the time when stream analytics processed the event, but obviously, this value no longer exists for us to use. So instead, we need to change anywhere we use “EventProcessedUTCTime” to use instead “EventEnqueuedUTCTime” which is the time the event hit the Event Hub. This is arguably a better value to use anyway.
Once you make this change and you see data start coming in, your reports should then update to show the latest data.
Function Code
The deploy to Azure feature earlier in this document should setup all the resources for you, including deploying the function code. However, if you would like to review the code yourself, it is all available on Github here - https://github.com/sam-cogan/SmartThingsCollector.
I would add that I am not a developer, so this function has been developed to work, rather than perhaps using development best practices, design patterns etc. If you are a developer and would like to help improve this function, please do feel free to submit a pull request!
Summary
I was always disappointed with the need to use Stream Analytics in the previous solution as it increased the cost significantly and made it difficult for most people to undertake this. By removing this cost and relying on a function instead, I hope this will mean more people can try out this fun way of working with data from their home.
