Storing Pulumi State in Azure
If you’re not familiar with the infrastructure as code tool Pulumi, I recommend you read my introduction article here first.
Pulumi, just like Terraform, utilises a state file for tracking what resources have been deployed. This state file allows it to know what has been deployed and so to do the work to compare current and expected state at deploy time. This state file needs to live somewhere, and it needs to be somewhere secure and accessible to all who are doing deployments. Pulumi’s state is a little more complicated than Terraform as it has the functionality to encrypt data in your state file, so not only do you need to store the state file, you need to securely store the encryption keys.
The default setup for this with Pulumi is to use their cloud service, which removes all the complexity from this and lets you focus on doing your deployments. This is great, however what if you are in a situation where you don’t want to, or can’t, use their cloud service? Pulumi does offer the ability to use alternative backends, in particular, you can use cloud storage on Azure, AWS and GCP. However, the documentation on how to set this up on the client-side is a bit limited in my view, and it took me a while to get things set up. So for anyone attempting this in the future, this article will explain how to do this.
There are two steps to set up state management:
- Configure the client to store your state file in Azure Blob Storage
- Configure the client to use Azure Key Vault as the encryption provider for your state file
Configure Azure Blob Storage
The first thing you are going to need is a storage account and a container in that storage account for storing the state. Unfortunately, currently, Pulumi does not support using Azure credentials to authenticate to the storage account so you will need to get either the storage account key or a SaS token. I would recommend using a SaS token as this can be scoped to the specific container and given a limited expiry date.
Once we have a key, we need to set two environment variables in the terminal where we will run the Pulumi commands:
- AZURE_STORAGE_ACCOUNT - this should be the name of the storage account
- AZURE_STORAGE_SAS_TOKEN or AZURE_STORAGE_KEY - pick the correct one depending on which key you are using, this should hold the key
PowerShell
$env:AZURE_STORAGE_ACCOUNT="<storageaccountname>"
$env:AZURE_STORAGE_SAS_TOKEN="<long SaS token key>"
Bash
EXPORT AZURE_STORAGE_ACCOUNT=<storageaccountname>
EXPORT AZURE_STORAGE_SAS_TOKEN=<long SaS token key>
Once the environment variables are set, you need to run the following command to connect Pulumi to the storage account and container for the state:
pulumi login --cloud-url azblob://<containerName>

You are now set up to use Azure Blob storage for the state. When you run the pulumi stack init <stackname> you should see a new file created in the storage account for that stack.
Configuring Key Vault
We are now using Blob storage for storing our state, but the encryption key is still held locally. We also want to switch to using Key Vault for storing this key.
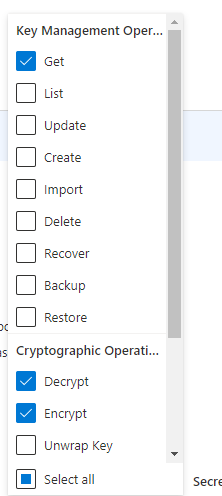
First thing, we need to create a new Key Vault using whatever method you like. Once this Key Vault is created, you need to make sure that user doing the deployment (real user or service principal) has an access policy set up to allow them access. In particular, they need access to get Keys, as well as the Decrypt and Encrypt rights. Note that these two rights are not granted by default, even if you are the owner of the Key Vault. If you find that you get errors about not being able to decrypt, check this permission.
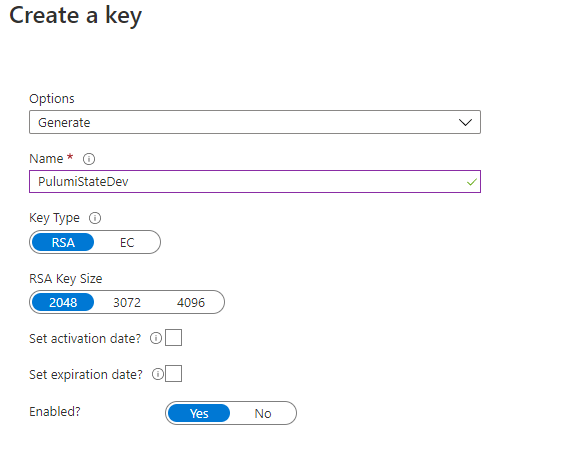
Next, we need to create a key in Key Vault. Go to the Keys section and click Generate/Import. You can have Key vault generate this key for you.
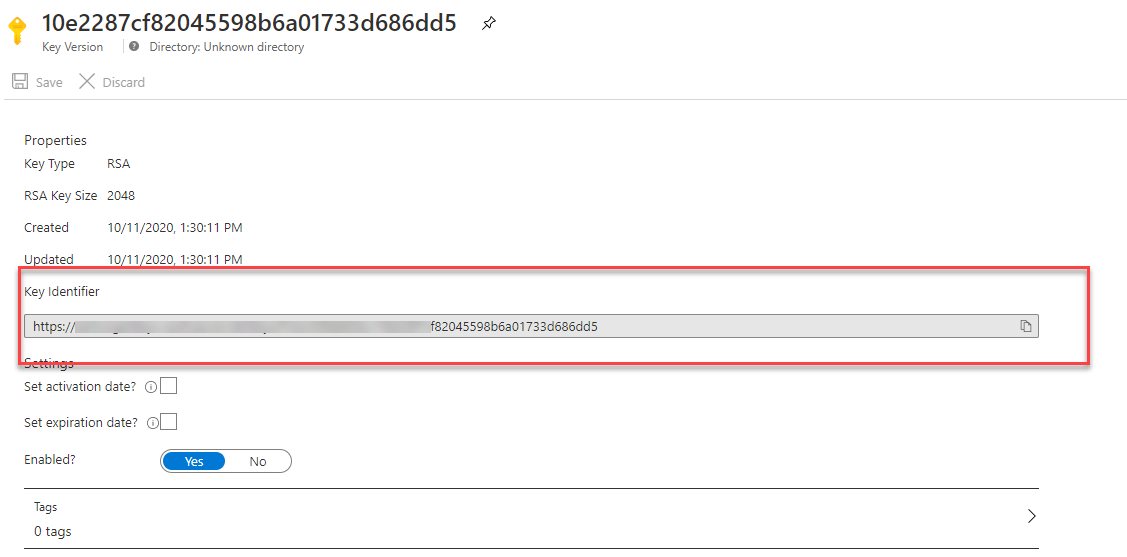
Once the key has been created click on the current version and get the key identifier URL, make a note of this.
If we try and configure Pulumi to use this Key now, you will find that it waits indefinitely. To fix this, we need to set the AZURE_KEYVAULT_AUTH_VIA_CLI environment variable to true.
PowerShell
$env:AZURE_KEYVAULT_AUTH_VIA_CLI="true"
Bash
EXPORT AZURE_KEYVAULT_AUTH_VIA_CLI=true
Now we are ready to create our stack, with encryption set to use Key Vault. Get the key URL you noted down earlier and drop the https and replace it with azurekeyvault://. Use this in the stack init command like this:
pulumi stack init --secrets-provider="azurekeyvault://vaultname.vault.azure.net/keys/keyname/keyid"

You are now ready to work with Pulumi, with your state and encryption keys in Azure.
