Static IP Ranges with Azure Public IP Prefixes
Azure has offered the ability to get static public IP addresses for many years now, however when you request an IP you will receive one from the general pool of available addresses and it is very unlikely you will receive multiple IPs in the same range. A new preview feature announced at Ignite changes this, called Public IP Address Prefixes.
Instead of requesting a single static IP you can request a Prefix, which will give you a contiguous range of IP addresses. You can then assign IP’s from this range to your VM’s, Load Balancers and other resources. The benefit of this is that you get a a contiguous range of IP’s that you know the addresses of up front, which you can then allocate as required. This means that if you need to work with customers of service providers to whitelist your IP’s you can now do this with a set range, rather than having to update this each time you create a new IP in Azure.
In the rest of this article we’ll take a look at how you work with IP prefixes.
Restrictions
First off, public IP prefixes is in preview currently, so has limited SLA, and is only available in certain regions (at the time of writing this is West Central US, West US, West US 2, Central US, North Europe, West Europe, and Southeast Asia). In addition the following restrictions apply
- Whilst you receive a contiguous range of addresses, you do not get to choose the IP address space you get. IPs are allocated from the Azure IP pool for your region.
- IPv4 addresses only
- Ranges are per region, if you need to deploy in multiple regions you will need to create a prefix per region
- IPs from a prefix cannot be used for classic resources
- You can create between a /31 (2 addresses) and a /24 (256 addresses) with the default being a /28 (16 addresses)
- Public IPs created from a prefix must use the standard SKU, not basic
Create an IP Prefix
Azure Portal
To create an IP prefix using the Azure portal you need to use a preview portal currently. This can be found at https://aka.ms/publicipprefixportal. Once connected to this portal:
- Click create a new resource
- Search for “Public IP Prefix”
- Click “Create”
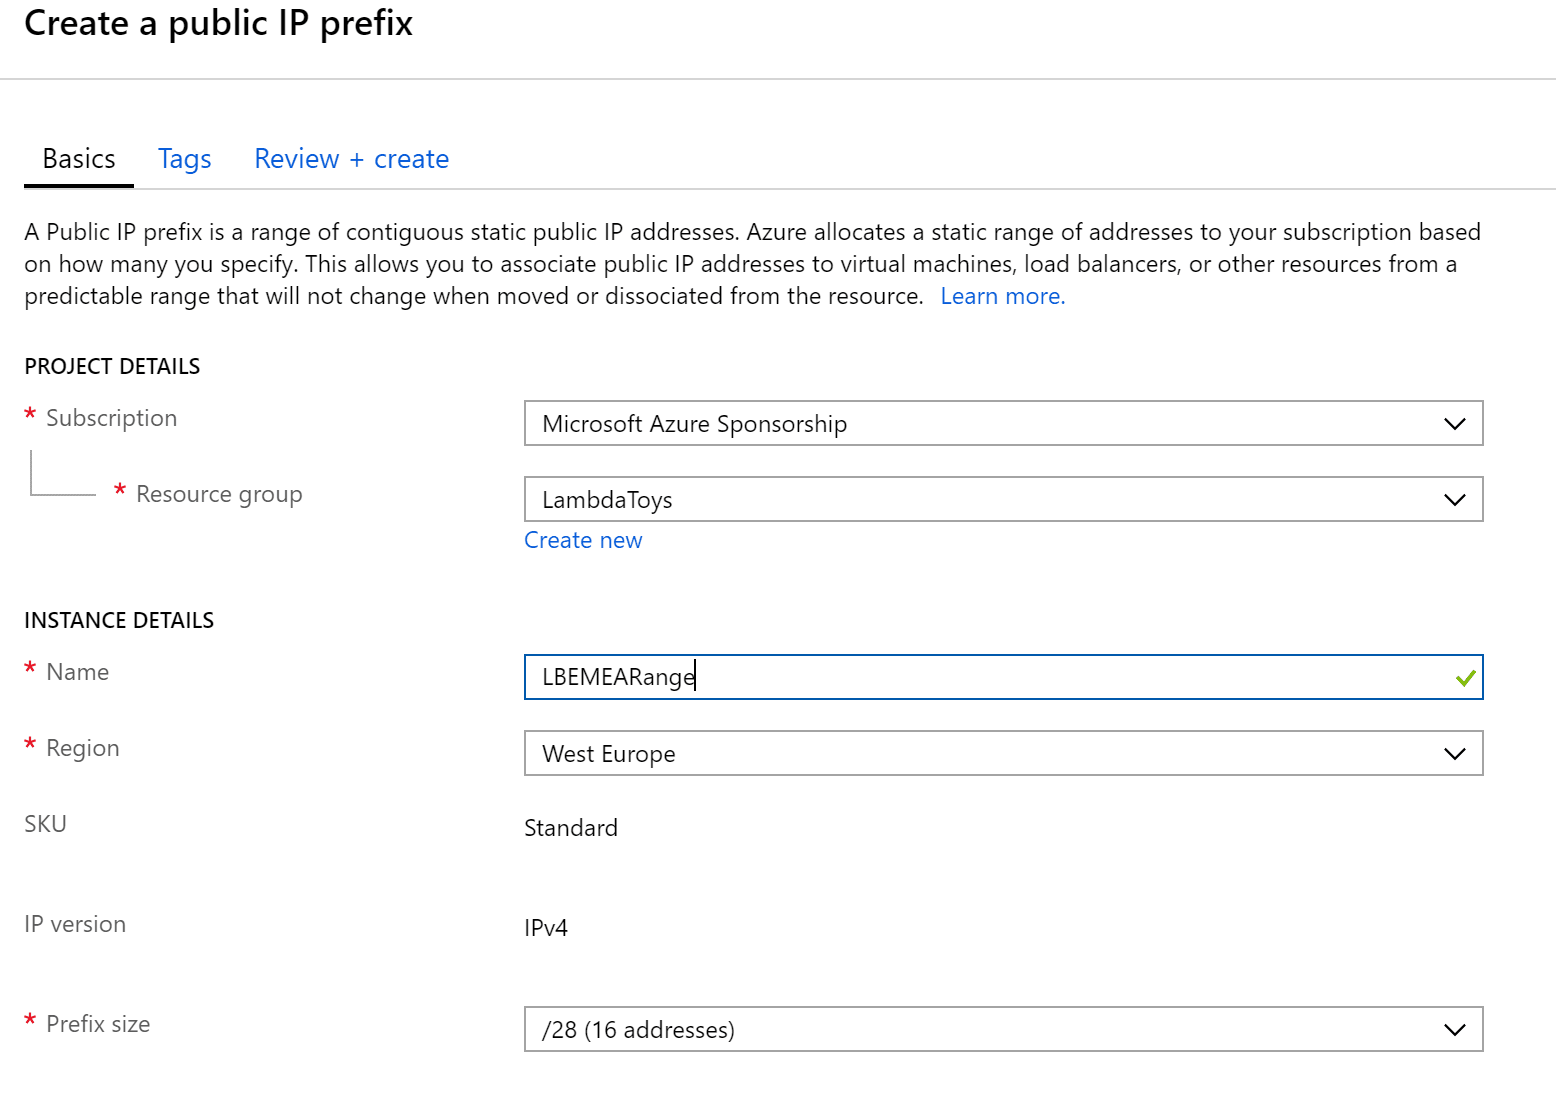
- In the window that opens select a resource group to deploy to then enter a name for your range and a region
- In the prefix size drop down, select the size of the range you wish to create
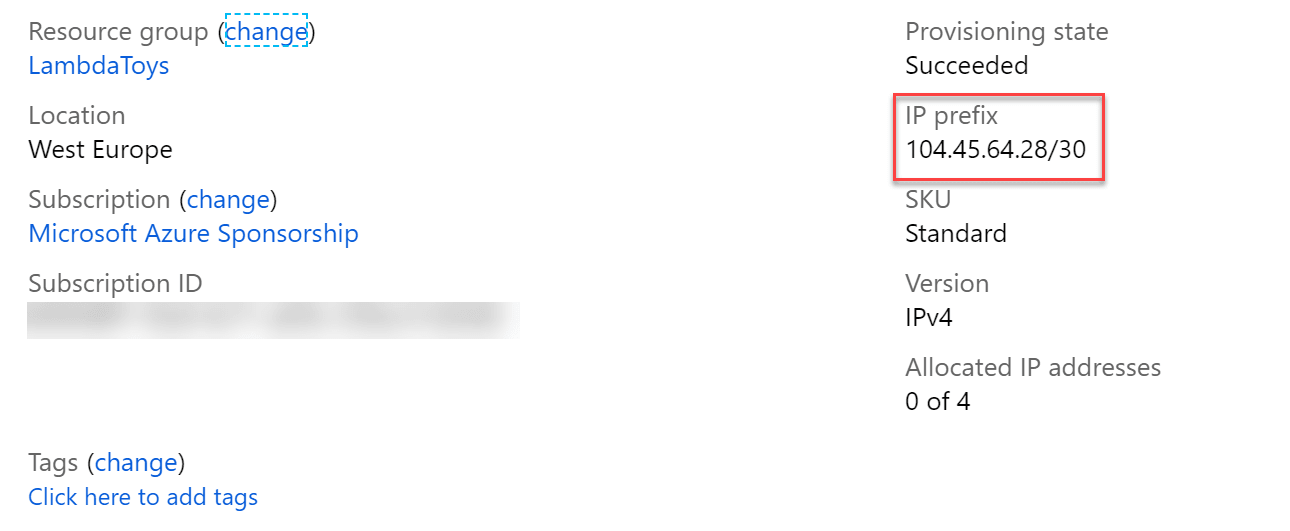
The IP Prefix will get created and if you click on the new item in the portal you will be able to see the IP range you have been allocated.

Command Line
IP Prefixes can be created with both PowerShell and CLI. You need to have either PowerShell Network Module 6.3.1 or later, or CLI version 2.0.41 or later.
PowerShell
New-AzureRmPublicIpPrefix -Name <prefix name> -ResourceGroupName <resource group name> -location <region> -PrefixLength <prefix length, eg. 31>
CLI
az network public-ip prefix create --name <prefix name> --resource-group <resource group name> --location <region> --length <prefix length, eg. 31>
Use an IP Prefix
Now you have a prefix created and a set of contiguous IP addresses allocate , you can create Public IP Addresses using these addresses and then use that IP with resources such as VM’s, Load Balancers and Azure Firewall.
Azure Portal
To create an IP using the portal, again make sure you are using the preview portal (https://aka.ms/publicipprefixportal) and locate the IP Prefix you create previously and click on it. This service is now GA
In the window that opens, on the overview page you will see a button for “Add IP Address”.

Click on this and you will be asked to enter a name and DNS prefix for the IP you wish to create.
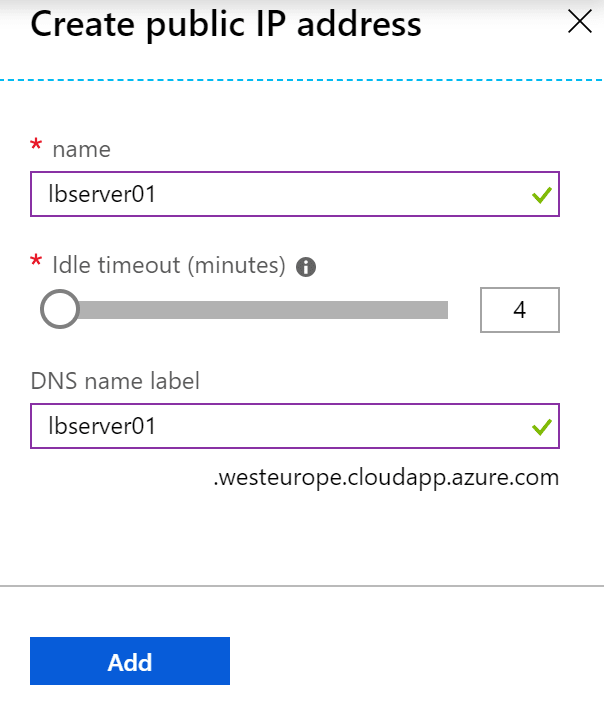
Note that you do not get to select which IP in the range is used, it will be selected for you. The IP address will also be created in the same region and resource group as the prefix. If you want to put the IP in a different region you should use the command line to create it.
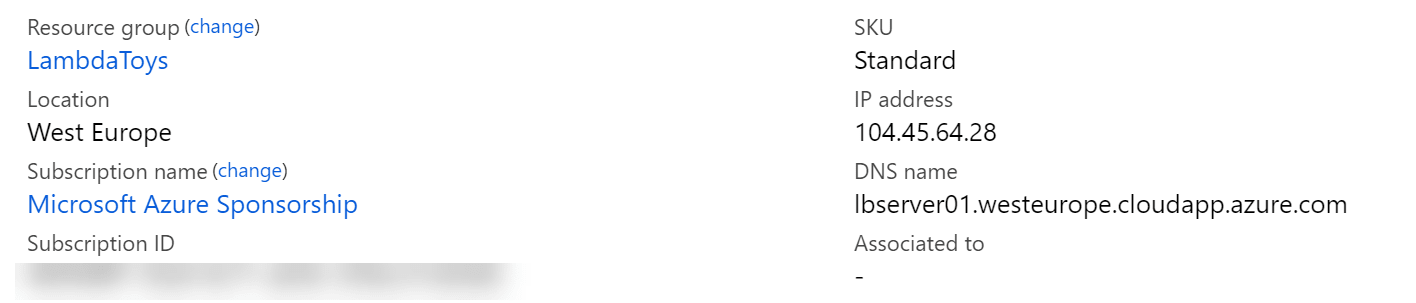
We will now see an IP address created in that resource group with an IP from the range. We can now use this IP in the same manner as any normal public IP.
Command Line
PowerShell
-Name <prefix name> -ResourceGroupName <resource group name> -Location <region> -PublicIpPrefix <name of prefix to take IP from> -DomainNameLabel <DNS name> -SKU standard
CLI
az network public-ip create --name <public IP name> --resource-group <resource group> --location <region> --public-ip-prefix <name of prefix to take IP from> --dns-name <DNS name> --sku standard
Image Attribution
network flickr photo by sethstoll shared under a Creative Commons (BY-SA) license
