Image Quarantine in Azure Container Registry
If your publishing new images to your container registry, there is often a need to do some testing before putting these images live. The most common requirement for this is to undertake vulnerability scanning, where images need to be scanned and found clear of vulnerabilities before anyone uses them. A number of the vulnerability solutions on the market work directly against the container registry and so require access to the images in the registry to scan them. This has been an issue in the past with Azure Container Registry because if the images are available for scanning, they are available for download.
Quarantine is a new preview feature in ACR which looks to resolve this problem. By enabling a container registry for quarantine and new images that are published are automatically quarantined and are not available for general use. Quarantine allows for scanning or any other testing you want to undertake before they are then marked as good, and made available for general use.
Enabling quarantine requires the Premium SKU of Azure Container Registry.
Preview Beware!
Beware, Quarantine for ACR is in preview, and the experience of setting it up and using it is not for the faint hearted. There is no UI for this, and there are not even PowerShell or CLI commands for most things. If you need quarantine for ACR now this will work, but your going to need to build some of your own scripts and process to make it work.
If your looking for a UI, or simple to use cmdlets you may want to wait until it is in preview.
Enabling Quarantine
Unfortunately due to it being in preview, there is not an easy UI or even PowerShell command to enable quarantine we need to use the REST API to do this. It was pointed out by @4c74356b41 that you can indeed set quarantine mode using PowerShell, details below. I have left the Rest approach as well in case you prefer to use that.
PowerShell
You can use PowerShell to enable quarantine mode using the “Get-AzResource” command, which allows you to work with any generic Azure Resource. The command below will fetch this resource and enable the quarantine policy.
$a = Get-AzResource -ResourceId '/subscriptions/xxx/resourceGroups/yyy/providers/Microsoft.ContainerRegistry/registries/zzz'
$a.properties.policies.quarantinePolicy.status = 'enabled'
$a | Set-AzResource
Rest API
You need an Azure Service Principal with contributor rights on the container registry to follow the steps below, follow this article to create one.
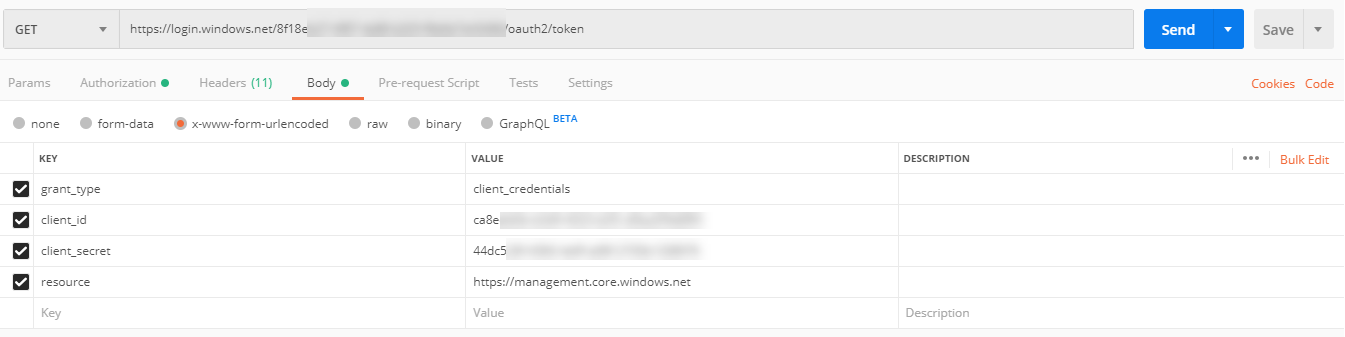
I would recommend using PostMan or similar tools to do this; the examples below use PostMan. Before we can set that up, we need to get an Azure AD token to authenticate to the API. To do this, we can create a new request in PostMan.
This request is a GET request to the URL “https://login.windows.net/{tenantID}oauth2/token" where {tenantID} is the ID of your Azure AD tenant. In the body tab select “x-www-form-urlencoded” for the type, then add key/values for the following:
- grant_type = client_credentials
- client_id = the applicaiton ID of your service principal
- client_secret = the password of your service principal
- resource = https://management.core.windows.net
Your PostMan request should look like this:
Submit this request and the response you get back should include an “access_token” field, copy the value of this.

Now we have an authentication token we are ready to send the request to ACR to turn on quarantine. Open a new request in PostMan, change the type to “PATCH” and enter the URL:
You are replacing the sections in {} with your values. Next, go to the “Authorization” tab and in the “type” dropdown, select “Bearer Token”. In the “Token” field that appears, add the value of the access_token field from the previous request.
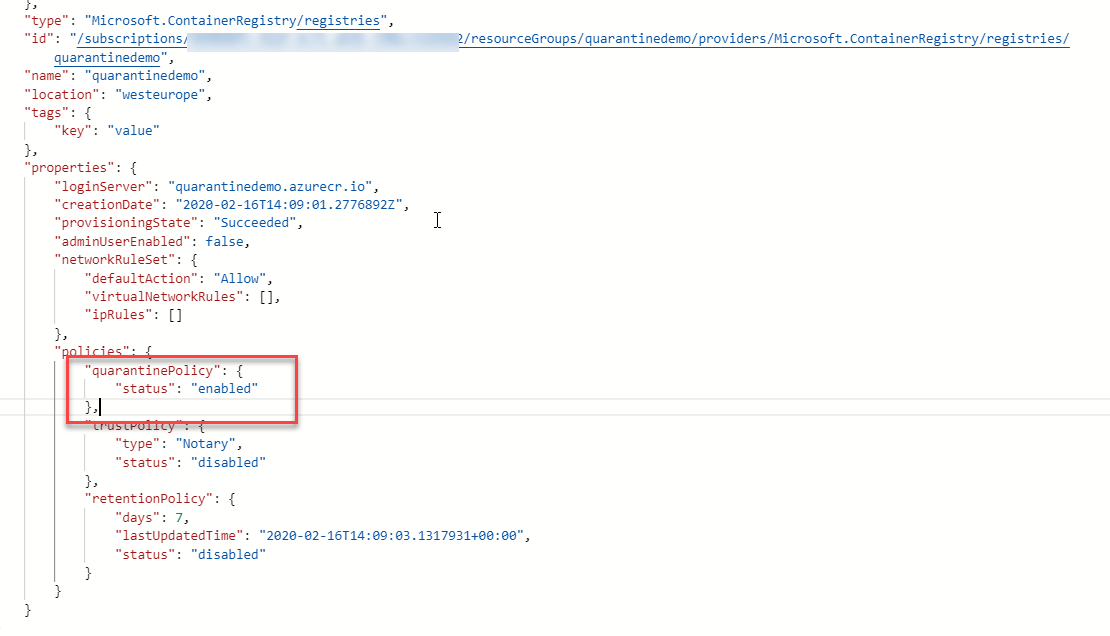
Next, go to the “Body” tab, select “raw” and then in the drop-down at the end select “JSON”. In the body field, enter the following JSON:
{
  "properties": {
    "policies":{
        "QuarantinePolicy":{
            "status":"enabled"
        }
    }
  }
}
Once you have entered all this, hit send. This request should return a JSON description of the registry, check the policies section to confirm that the quarantinePolicy is enabled.
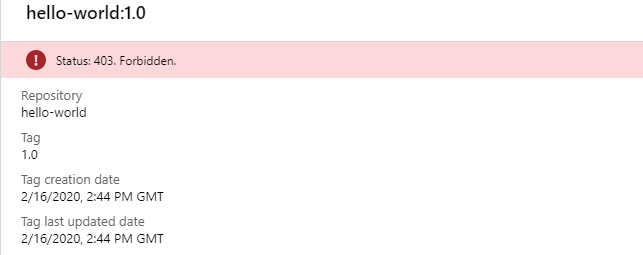
Once this is enabled, if we push an image to the repository and then look at that image in the portal, we see a 403 error indicating it is not available to us as it is quarantined. If we tried to pull that image, it would fail.
Accessing Quarantined Images
Quarantining every image we publish to this repository is excellent, but now we need a way to be able to access these quarantine images to undertake our scans or tests. To do this, you need to grant the user or service principal that is running your tests the “ACRQuarantineReader” Azure RBAC role. This user can then be able to download the images from this repository as if they were not quarantined to then run whatever tests you like.
Removing from Quarantine
Once you have run your tests and deemed the image is safe, you need to move it out of quarantine. To do this, you first need to grant the user or service principal that will do this the “ACRQuarantineWriter” RBAC role. This user now has the rights to mark the images as no longer quarantined. Unfortunately, this is again something we need to do using a REST API.
First, we need the digest of the container we want to remove from quarantine. We can do this from the CLI using this command:
az acr repository show-manifests --name {ACR Name} --repository {repository name} --detail
This will return the manifest data for all the images. Find the one you want and copy the digest value, which looks something like “sha256:e5785cb0c62cebbed4965129bae371f0589cadd6d84798fb58c2c5f9e237efd9”
Now we need to get an authentication token for ACR to make this change. Unfortunately, the Azure AD one we got earlier won’t work, we need to exchange this for an ACR token. This exchange is a 2 stage process. First, we exchange the Azure AD token for an ACR refresh token, then exchange the ACR refresh token for an ACR Access Token.
In postman, create a new POST request to the URL “https://{acr name}.azurecr.io/oauth2/exchange”. On the Body tab select “x-www-form-urlencoded”, in the key/value section add the following:
- tenant = Azure AD Tenant ID
- grant_type = access_token
- service = name of your ACR repo including azurecr.io suffix
- access_token = your Azure AD token generated previously (without the “bearer” part)
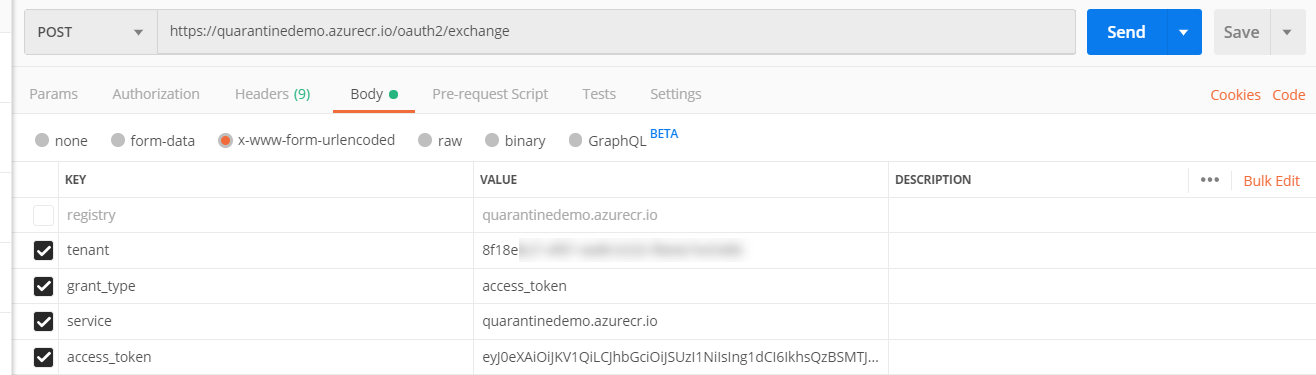
Submit this, and the response should come back with a refresh_token field, copy this value.
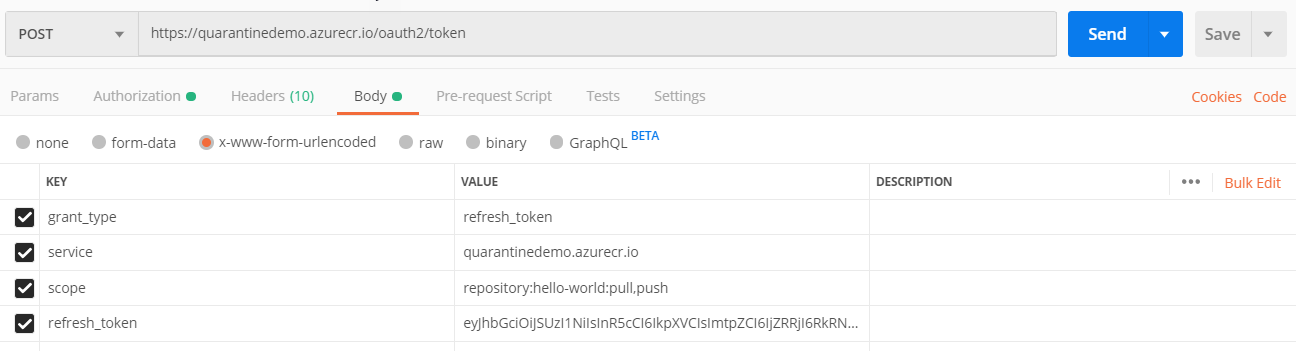
Now we can get an access token. Create another PostMan POST request, this time to URL “https://{acr name].azurecr.io/oauth2/token”. Again select “x-www-form-urlencoded” and in the key/value section enter the following:
- grant_type = refresh_token
- service = name of your ACR repo including azurecr.io suffix
- scope = repository:{name of repositoryu}:pull, push
- refresh_token = token from the previous step
Send this, and you should get a response back with an “access_token” field, copy this.
We are now finally ready to un-quarantine our image. Create yet another PostMan request, this time a “PATCH” request to https://{acr name}.azurecr.io/acr/v1/{repo name}/_manifests/{digest}, for example
On the authorisation tab in the “type” drop-down, select “bearer token”, in the Token field add the access token from the previous step.
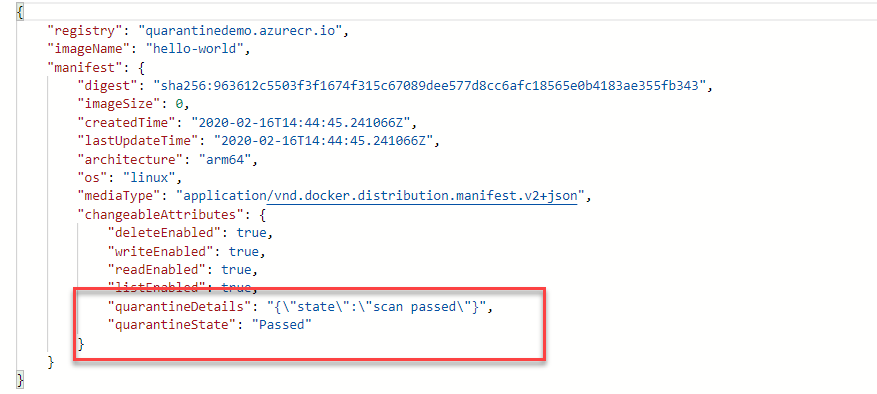
On the Body tab, select “raw” and then “JSON” from the drop-down in the Body section enter JSON like below:
    {
        "quarantineState": "Passed",
        "quarantineDetails": "{\"state\":\"scan passed\"}"
    }
The QuarantineState option can either be “Passed” or “Failed”. The details section can be anything you want to add to the metadata of the image to log information about its testing.
Send this, and you should get a response with the image details, including our new quarantine state information.
The image is no longer quarantined and is ready for use.
The above steps are a very manual way to remove the image from quarantine. They are useful to understand how this all works, however in production if you wanted your image scanning pipeline to do this work you would want to look at writing some script to get the right access tokens and set these quarantine values.
WebHooks
ACR offers several webhooks which you could use to trigger this process. In particular, there is a “Quarantined” webhook which is called whenever an image is quarantined, which you could subscribe to trigger your testing and image release process. You can find details of the webhooks here.
Summary
Being able to quarantine images for testing before you put them live is a vital feature for those using ACR in production. If you’ve worked your way through this article, you can see that at the minute this very rudimentary and lacks a lot of the things I would like to see for a GA level offering, however it is usable if you need quarantine today. You would need to some work to build automation around this process to avoid all the manual steps we took, probably using the webhooks to trigger your process.
