Azure Container Registry Token Authentication
This isn’t a particularly new feature, but it’s one that I’ve seen quite a few people not know about. Azure Container Registry is a private container registry that requires you to authenticate before you can access it. The simplest way to do that is to use Azure RBAC to access with your user account, service principal or managed identity. However, there are some scenarios where this won’t work. In particular, if you need to use the docker login command. This has come up recently because Azure Container Apps doesn’t support using Managed Identity (yet), and you need to provide a username and password for the container registry.
The immediate reaction might be to use the Admin account you can enable on ACR, but this is a mistake. The admin credential gives you full admin rights on the repo, which is overkill if you want to push or pull an image. Instead, you can use ACR tokens to generate a credential that has the rights you want.
Tokens can also be used to grant access to external users who can’t use RBAC or even to users who can use RBAC, but you want to limit access to specific container images. Unfortunately, ACR doesn’t let you scope RBAC permissions to images, but you can do this with a token.
Note that Container Registry Tokens are currently in preview
Pre-Requisite
The significant limiting factor with ACR tokens is that they are only available on the Premium SKU of ACR. The basic and standard versions do not support it. This means the price goes from $5 per month to $50, which is not ideal. The premium SKU does offer several other features that you probably want to use as well:
- Geo-Replication
- Private Endpoints
- Increased Storage and performance
- Content Trust
- Customer Managed Keys
- Tokens and Scope Maps
Scope Maps
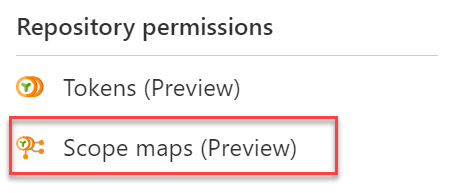
The first part of setting up a token is creating a scope map. A scope map defines a set of permissions granted on a specific collection of images (or, in ACR speak, repositories). To create a scope map in the portal, go to the container registry, and find the “repository permissions” section. Click on scope maps.
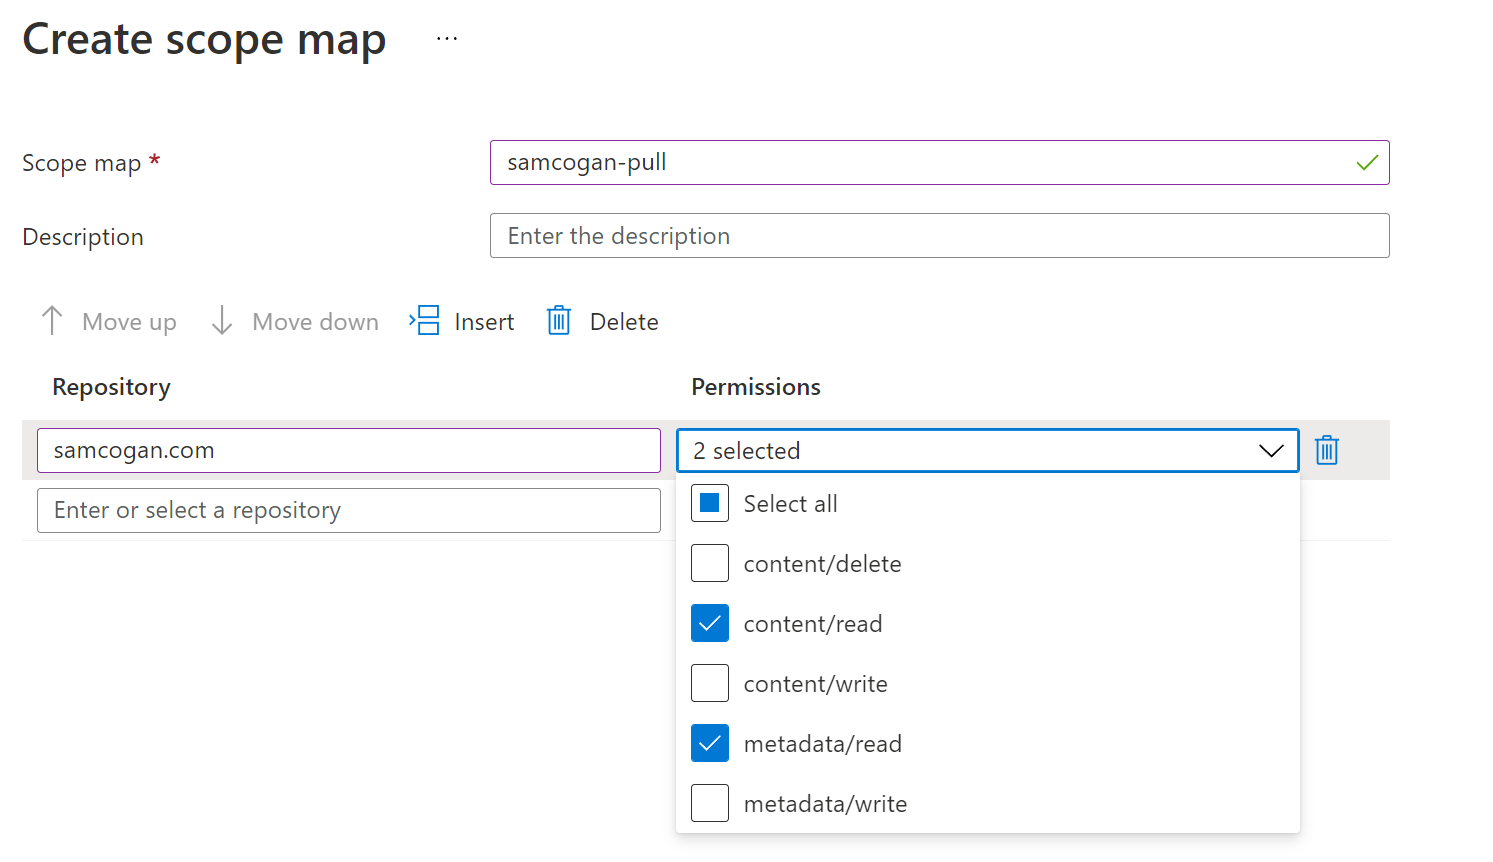
There are three built-in scope maps that you can use if you want that provide admin, pull or push rights across all repos. To create a custom one, click on add. Provide a name, and then you can proceed to add the repositories you want to provide rights to and the specific rights for those repos. In the example below, I am granting only read (pull) access to the samcogan.com repo.
Generate Token
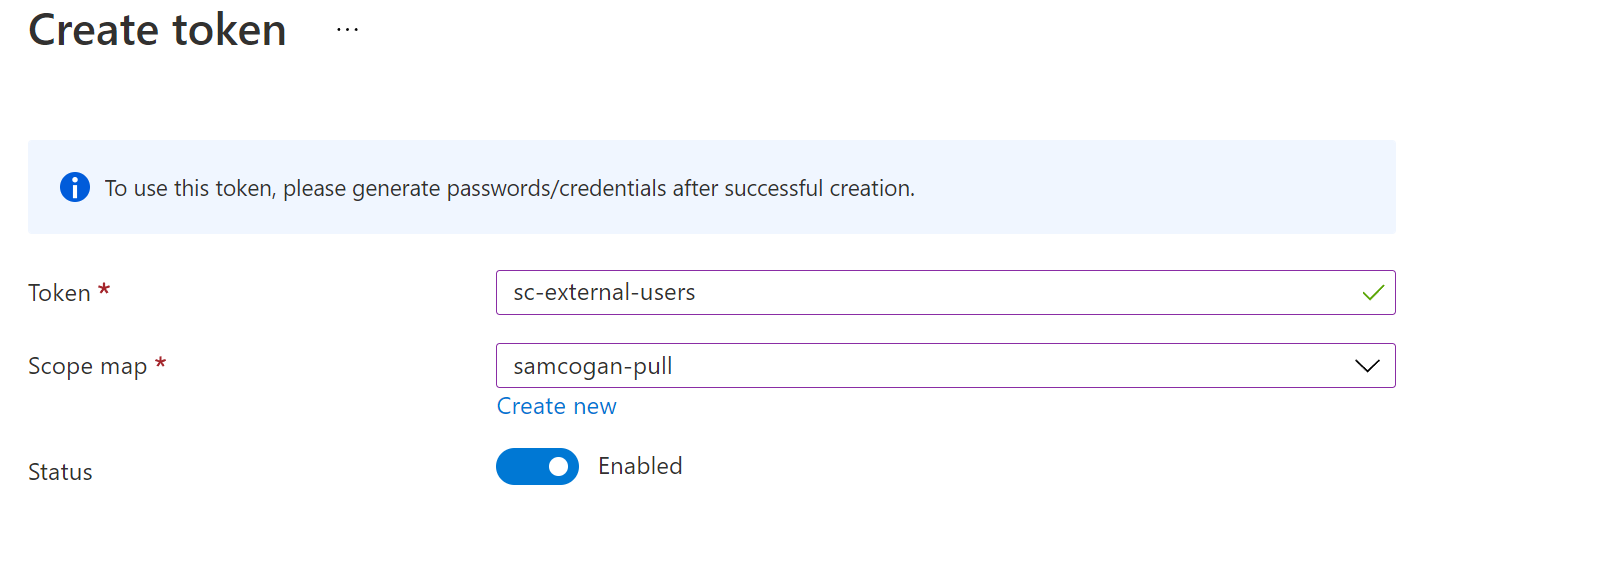
Now we have a scope map we want to use, we are ready to generate a token. Go to the “Tokens” page in the portal and click add. We need to name the token and select the scope map we just created. We also can disable the token if we want to create it but not enable it yet.
Once the token has been created, we should see it in the list.

You will notice that the password has not yet been generated, so we can’t yet use this token. To get the credentials click on the token, then hit the generate icon next to one of the two passwords. This will create a credential. There are two passwords to allow for key rotation. When you create the password, you also can set an expiration date if you want to generate a short-lived token. Once you click generate, the UI will show you the password and the full docker login command to log in with it. This password will only be displayed on this screen once, so be sure to save it somewhere secure for use later.
The username will be the same as the name of the token. So for my token, the login command will be:
docker login -u sc-external-users -p password samcogan.azurecr.io
You can now distribute these credentials to where ever you need them. If you need to change or remove these credentials later, you can come back to them and either regenerate the password or delete them altogether.
